Seasonal Camping Sites
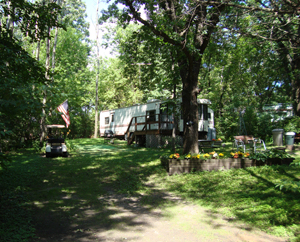
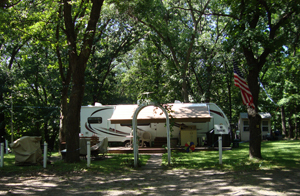
Just think, packing a few pieces of clothing, a short drive from the Twin Cities, stopping at the large local grocery store for a couple of items, and another 2 minutes of driving, and you have arrived at a vacation home personalized just for you. We can’t imagine having a better location for a seasonal lot. An “Up North” feel without the long, crowded drive each weekend. Permanently park your rig and enjoy each weekend or the whole summer without the hassle of moving your rig from place to place.
Our seasonal community is robust, and many events focus on their involvement. We have live bands playing at the rec hall, community potlucks, and card games.
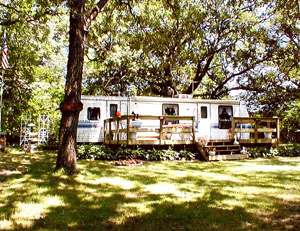
At A-J Acres, we allow our seasonal residents to modify the lot to suit their needs and lifestyle better to make it feel more like their home away from home. We encourage decks and landscaping for your enjoyment and betterment of the site. However, we require approval from the A-J Acres owner to make such improvements. All improvements must meet local building codes and not affect fellow residents or campers.
Helpful Tip: Decks
At just about every seasonal campsite, the resident has added a deck. The problem with a permanent deck is that you will have to tear it apart if you want to reposition your RV. A solution to this is to build a modular deck system consisting of multiple 4’ x 8’ sections bolted together. Then, when you want to move it, you can unbolt it and, if needed, move it in sections in the back of a truck. This method does require more pieces of wood but the structural members are much smaller. Additionally, each corner must be supported by a footing. The decks should meet local building codes if built according to the method described below
Lay out two 2×6-8’ rim joists on saw horses and mark intersecting joists locations 16” on center. Using a scrap piece of 2×4 as a guide, install joist hangers so the 2×4 guide is flush with the top of the rim joists. Starting with one of the extended rim joists using 3” screws, install the end rim joists. Then, install the middle 2×4 joists into the joist hangers. Follow up with the other long-rim joist and repeat. Now you have the frame built.
Place the frame on flat ground and install the two straightest lengths of decking along the extended rim joist flush to the edges. Using 2” screws, attach one screw to each joist. Square up the mini deck by measuring from corner to opposite corner. The measurements must be the same, or the additional decks cannot be bolted together. If not, push or pull on the corners till they are. Finish screwing down the deck boards you have already attached. Place the remaining deck boards between the two you have installed, spacing them equally.
Drill bolt holes for the carriage bolts in each joist bay and three on the ends. If you space them the same way on all modular units, the deck will bolt together no matter how you arrange them. Mark out on the ground where you plan to place the deck. You will need support on each of the corners of each module. You may use patio blocks to support the deck if on grade level. Pier blocks can be used if you need a little more height. If installing the deck higher than that, you will need a regular deck footing.
If you cannot crawl underneath to bolt it together, a deck board (one at a time) may be removed and reinstalled after the deck is in place. If you doubt your carpentry skills, please get in touch with a local carpenter for help.
Material List: (Each section)
- 2 2×6-96″ green treated boards
- 2 2×6-45″ green treated boards
- 5 2×4-45″ green treated boards
- 9 5/4×6-45″ cedar decking
- 2″ & 3″ triple-coated deck screws
- 3/8″ Hot dipped or stainless carriage bolts
4″ long w/ nuts and washers
Please visit our Contact Us page to ask us a question. To make a reservation, call us at 320-558-2847.